Hacking Cudy WR2100
Introduction
Recently for an interview I was asked to perform a pentest on a Cudy WR2100 router and report my findings as a presentation. The task was a lot of fun and I had a good time tinkering on it. Now that the interview is over, I am putting my notes and procedure up here to both organize my thoughts and hopefully provide a resource for others.
Overall this was a pretty quick pentest and there’s undoubtedly things that I missed, things that I could improve on - even by simply spending more time on it. This should be a pretty solid baseline and at least show some of the firmware hacking steps clearly in action.
Resources
Understanding the tools and documentation that people use in these kinds of operations is really important to me. I feel like it’s generally much more helpful to know how someone thinks and approaches a problem, in addition to why and what tools to use, than it is to simply follow a process. It helps me learn better, at least. Therefore, what follows is a list of resources I used while hacking on this router.
- OWASP Firmware Security Testing Methodology
- This is a really solid document that provides a grounding point for firmware investigation. The stages it outlines are really good for following a coherent flow. It helped me focus in on my efforts in addition to conveying useful techniques that I didn’t know or waas unsure of.
- OWASP Top 10 IoT 2018
- OWASP is a great resource for many reasons. In this case the list of top 10 vulnerabilities provides us another way to focus our efforts. Using this is an great for helping find the initial attack surface.
- Practical IoT Hacking (book)
- My favorite part about these books is the framework they provide. I don’t often read straight through, but I look for information relevant to what I’m thinking about. In particular, the tools section in the appendix is my favorite part because it usually allows me to efficiently put my thoughts into action.
- binwalk
- Super useful for gaining information and unpacking firmware. I won’t go into too much detail as this tool is ubiquitous.
My Setup
I have an old Dell laptop I keep around because it runs linux reasonably well and has an ethernet port with several usb’s. It’s great for this kind of thing in a way modern laptops have made a little cumbersome. I also used:
- USB to TTL Cable
- Saleae 8-channel Logic analyzer
- Raspberry Pi for SPI flash extraction
- Flashrom
- PCBite
- this thing is amazing.
I have Ubuntu 22.04 installed on the machine I used. However, both FACT and Firmadyne had some trouble installing because of the way Ubuntu changed their apt stuff (and some irritating Python stuff). I skipped on using them because I didn’t want to get (anymore) distracted. I am thinking of working on getting them to work and maybe writing a post for it.
Firmwalker was also a really nice little utility. It made a quick report of some interesting components of the firmware and helped refine where to look.
I used Ghidra mostly when looking at binaries. I haven’t worked with much mipsel, and haven’t configured Ghidra to look in the appropriate spots for libraries in the firmware so it wasn’t at its most efficient. It was much better than Binary Ninja out of the box, and since I didn’t want to become too distracted from my hacking, I just used Ghidra. I’d need to reach out to the Binja slack or some people smarter than me to figure out how to make mipsel binaries look a little better.
The Router
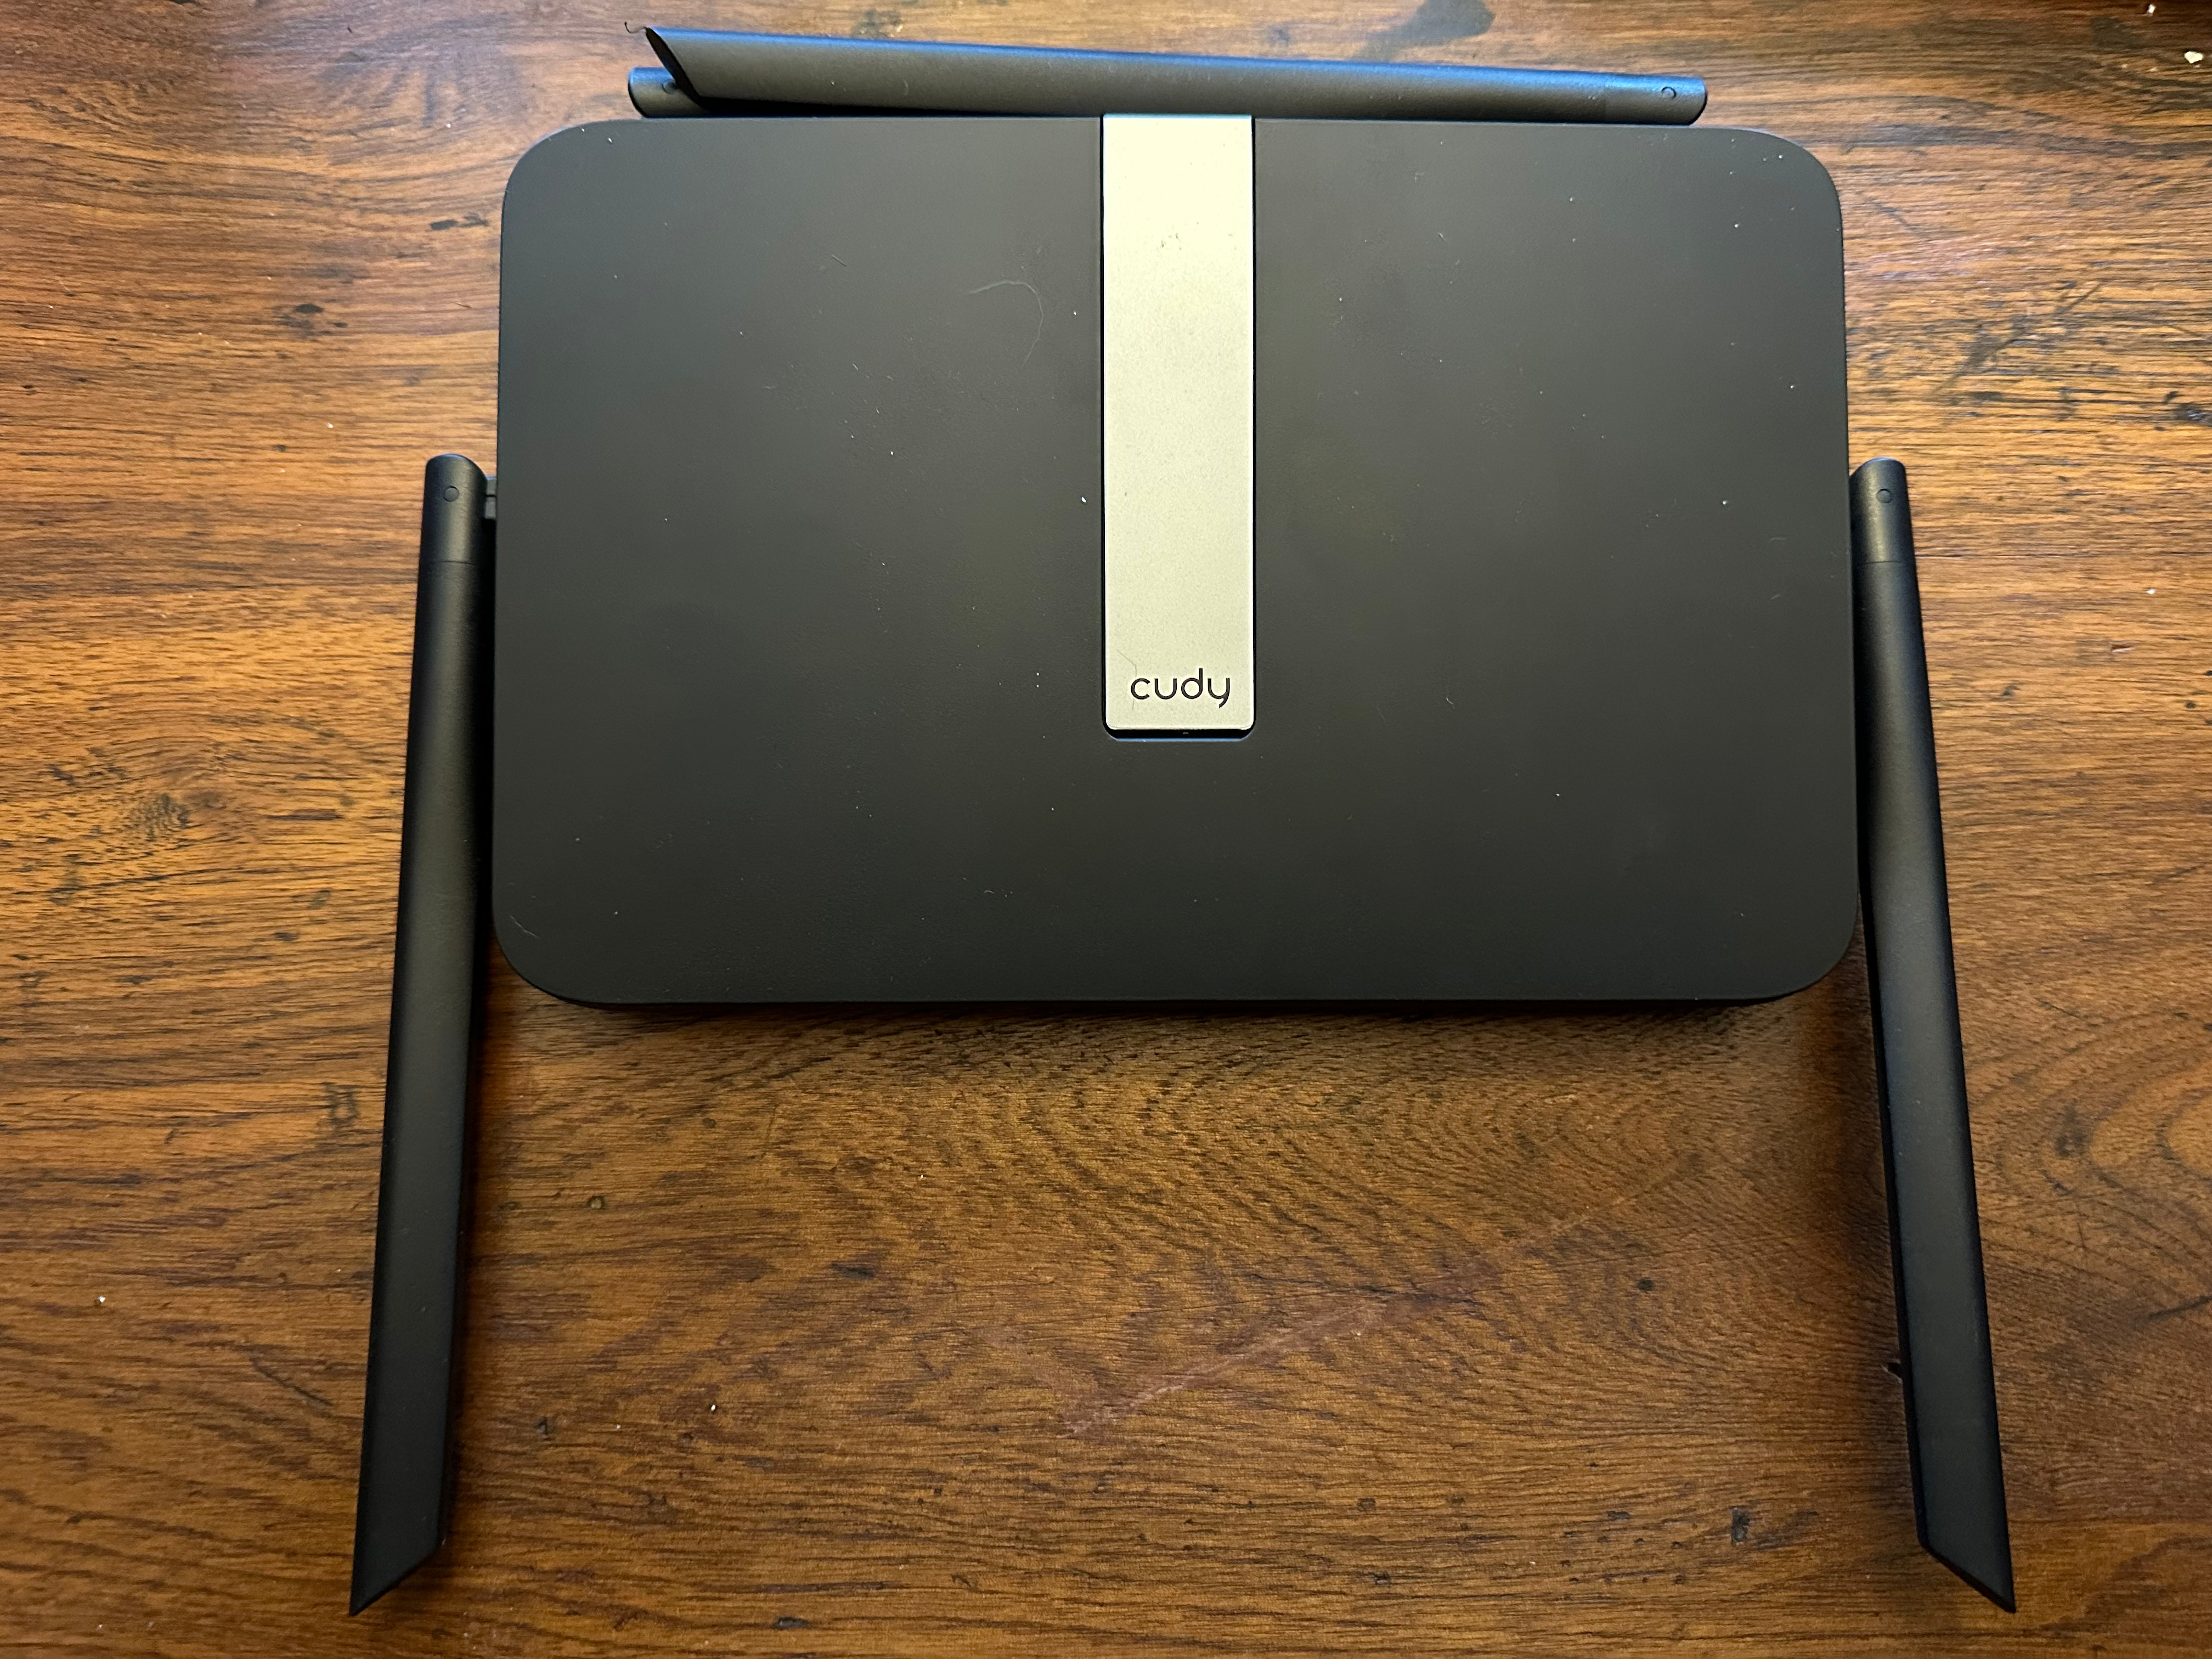
Cudy appears to be a relatively new manufacturer of cheap routers and can be easily obtained from Amazon which makes it a really interesting and easily accessible device to test. The router was shipped with version 1.7.4 of Cudy’s software. The latest version available on the website is 1.13.6. OpenWRT has a build for the WR2100 and has a bunch of information about the board, including UART information. It has two radio chips, one for 5ghz and one for 2.4ghz. I did not look into these, nor did I perform any wireless attacks, as much as I’d have liked to. The antennas were a pain to detach. They were friction fit onto the plastic router body, and removing them required a lot of force (and punching myself in the face. Oops).
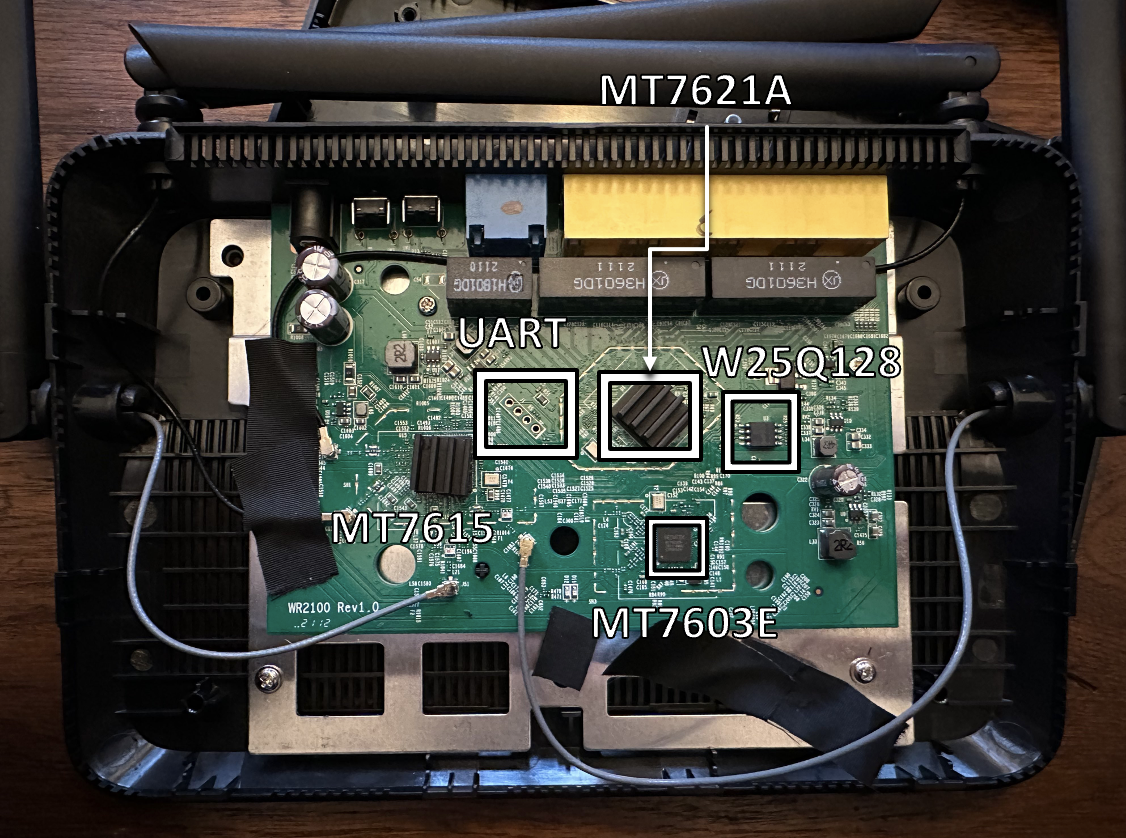
The headers for the serial interface are visible, which the OpenWRT page has labeled for us. Two unpopulated resistors are nearby the headers which indicates that the serial interface is electrically disconnected. Again the OpenWRT page has some information for us - either short them or place some low value resistors. I took some 22 awg solidcore wire, stripped it, and soldered them to the pads. It was messy and a terrible job, but it worked. I would have rather used some 0402 resistors, but I didn’t have any on hand.
The pinout can also be determined by a multimeter and inspecting the plating. Ground pins usually have several connections to the ground plane of the board, so a cross or something similar will be present to verify the pin. Using a multimeter reveals 3.3v on the upper most pin. For the TX/RX pins I lazily swapped my USB serial cable’s TX/RX until it worked. At 115200 baud 8N1 with the “resistors” attached (with hardware flow control diabled in minicom, so we can send data back), u-boot serial data is present. I also soldered some headers in order to ensure a reliable electrical connection
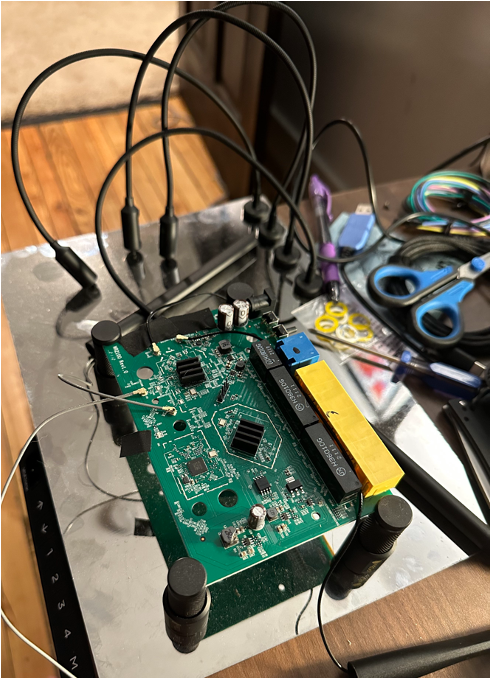
After hooking up the serial and verifying its overall function, I turned to extracting the flash. I’d never actually ripped flash from a chip like this before so it was an interesting exercise. The u-boot startup output revealed the part number of the SPI flash - W25Q128 SOIC-8 package. A quick google revealed a digikey listing of the chip along with a datasheet. Most importantly, this allowed me to get the pinout. As a side note, it seems that pinouts in standard chips tend to match really closely from manufacturer to manufacturer. Therefore, if a datasheet weren’t available, proper datat might be gleaned from other chips. I hooked up a logic analyzer to the chip and labeled the signals in the Saleae software. I turned the board on and watched the output and indeed I’d found the correct output.
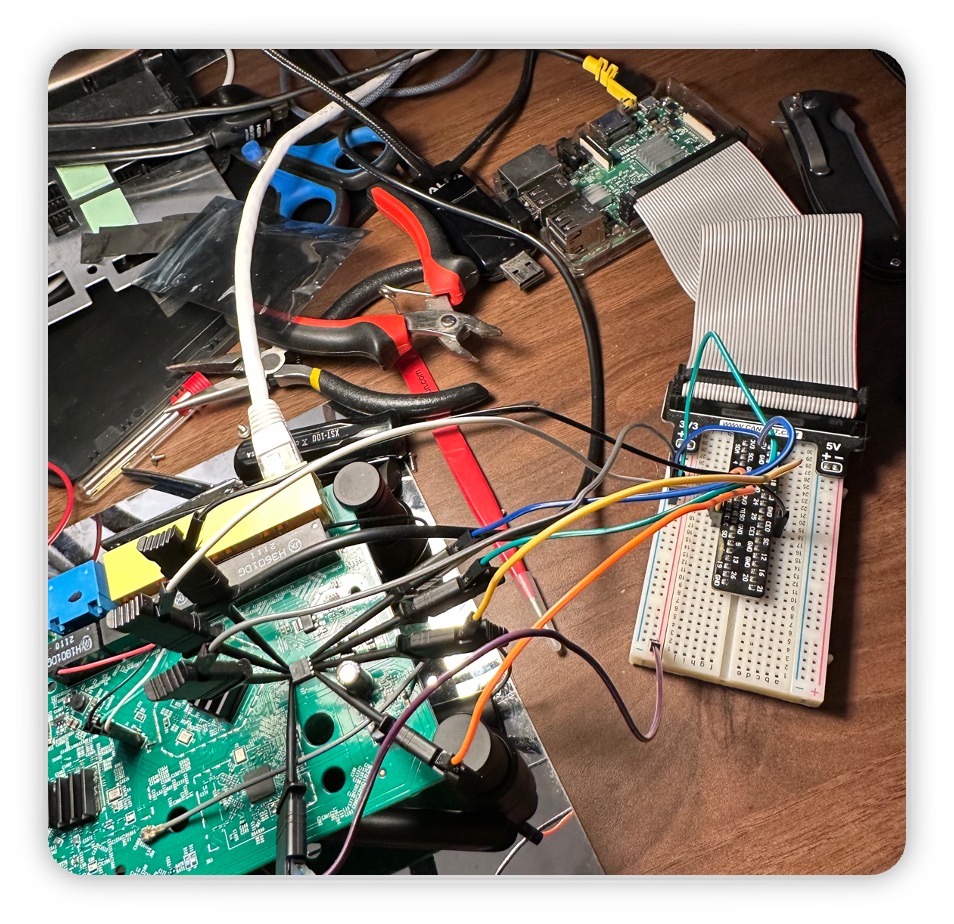
Since I wasn’t exactly sure how to extract the flash and what method would work best for me, I googled. I came across a blog post written by River Loop Security, a group of people I know fairly well as it turns out. Their blog post was super useful and used a Raspberry Pi with flashrom to extract the flash. I grabbed the RPi I use for Octoprint and flashed a new copy of Raspbian (or whatever it is these days), hooked up some jumper wires to the SPI pins, stole my logic analyzers clips (I bought a SOIC8 chip clip though after this), and hooked it up. I used the flashrom command indicated in River Loop’s post and success! Firmware! Worked first try.

The Firmware
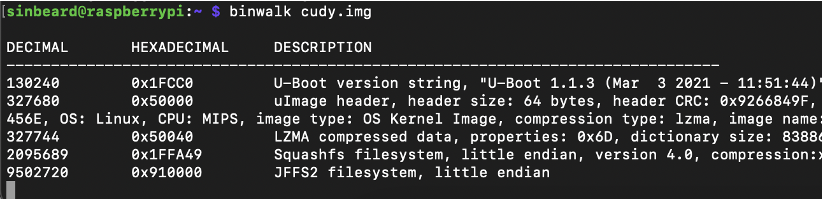
Binwalk verified that the firmware extraction worked as expected.
What I described above was one good method to grab the firmware for the device. In addition, I obtained the latest firmware directly from Cudy’s website. I ended up installing this to see if the bugs I found had been fixed (it wasn’t). Lastly, I also emailed Cudy directly for a copy of the firmware version present on the router. 1.7.4 was no longer easily available on the website, so I emailed them to see if they’d send it to me. To my surprise, they did. I didn’t do anything thorough, but the version indeed seemed to match the one I extracted (minus a few sections like bdinfo).
Anyway, this entire process is really useful because it allows us to investigate the attack surface and gather data about what kinds of vulnerable binaries or exposed credentials might exist. The first thing that jumped out at me was that this firmware isn’t encrypted in any way.
References
- OWASP Firmware Security Testing Methodology
- OWASP Top 10 IoT 2018
- Practical IoT Hacking (book)
- LEDE 17.01.6 Security Fixes
- lbwc.sh
- Quick and dirty script to look for vulnerable string
- Many links
- Pretty much all of the resources I used for this